
How Many Volts is a Marine Battery?
A typical marine battery is 12 volts. This refers to the nominal voltage rating of the battery. However, the actual voltage can vary depending on the state of charge of the battery.
When fully charged, a healthy 12V marine battery will measure between 12.6 to 12.8 volts. This is considered the optimal voltage for maximum battery capacity. As the battery discharges with use, the voltage levels will drop. A reading between 11.8 to 12.2 volts indicates a battery that is about 75% charged. Voltage falling below 11.8 volts is considered discharged, while below 11.6V is completely dead.
It’s important to note that marine batteries are really made up of 6 separate 2V cells connected in series. Each cell contributes 2 volts, for a total of 12-volt battery when fully charged. If one cell fails, it can bring down the total voltage of the whole battery. Testing each cell individually with a voltmeter can help diagnose problem areas.
Factors like age, usage, temperature extremes and improper charging can all cause a battery’s voltage levels to dip over time. A brand new 12V marine battery in good condition will show a resting voltage very close to 12.6V when fully charged. As a battery ages, the internal resistance increases causing resting voltage levels to decrease slightly compared to a new battery.
Using a voltmeter to periodically check the voltage of your marine battery is the best way to monitor its health and ensure it is holding a proper charge. Target voltage should be between 12.4-12.7V when rested, and no less than 12.2V when under load. Consistently low readings indicate a failing battery in need of replacement.

How Many Volts Do You Need to Start a Boat?
To successfully start a boat engine, most manufacturers recommend having your marine battery charged to at least 12.2 volts. This provides the burst of power necessary for the starter motor to crank and turn over the engine.
Trying to start with a voltage below 12.2V risks a slow crank or even failure of the starter motor to engage at all. This can be very problematic if you are stranded offshore and unable to start the engine to head back.
The exact voltage required depends on the size and power of your engine. Larger engines over 150 HP may require slightly higher voltage levels around 12.4-12.6V for reliable starting. Smaller engines under 50 HP can sometimes start with voltages as low as 12V.
However, getting your battery charged to at least 12.2V before heading out provides a safety buffer and reduces strain on the starter motor. This optimal starting voltage applies to boats with a single 12V battery system.
For boats equipped with two 12V batteries wired in parallel, the combined 24-volt battery system only requires around 24.4 volts for reliable starting power. Voltage in the 24-25V range is recommended for offshore boating to ensure you can always start your engine when needed.
Checking voltage with a handheld voltmeter before leaving the dock gives you peace of mind that your batteries can provide sufficient starting power. Top off charging if below 12.2V to avoid getting stranded on the water.
How to Use a Voltmeter to Check Marine Battery Voltage?
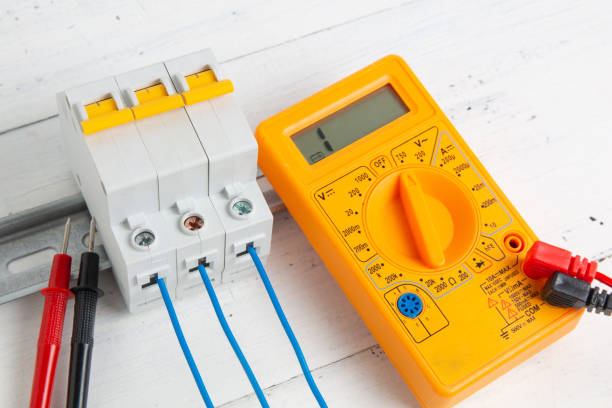
Using a voltmeter is the most accurate way to check the charge level and health of your marine battery. Digital voltmeters capable of reading up to 20V DC are inexpensive and widely available. Here are some tips on using one to test voltage:
- Set the voltmeter to the appropriate DC voltage range (typically 12V or 20V scale).
- Attach the black probe lead to the battery’s negative terminal. This is the ground connection.
- Touch the red probe lead to the positive terminal to get a voltage reading.
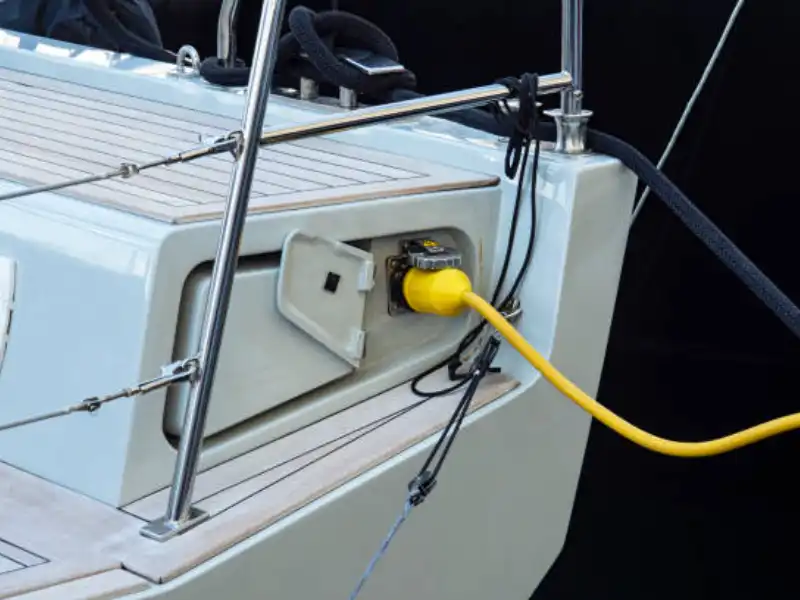
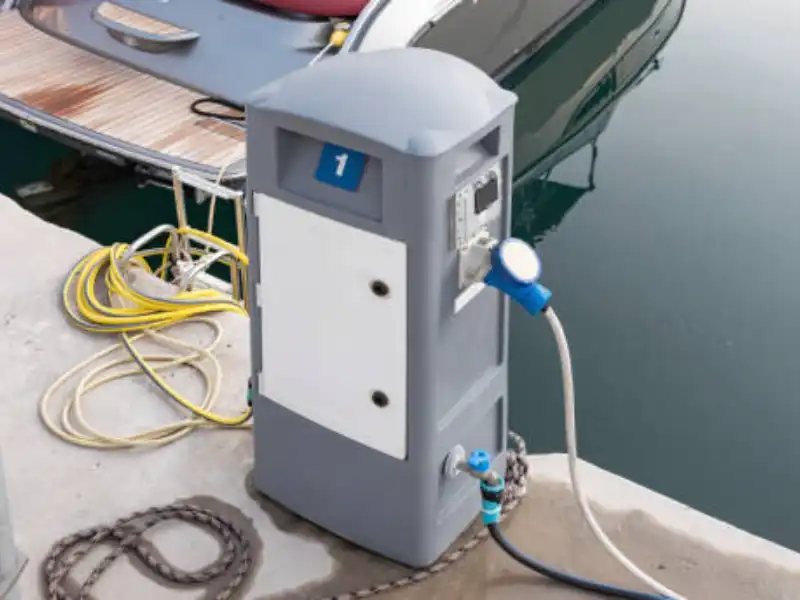
- Make sure there are no loads on the battery when testing. Turn off electronics and disconnect from shore power.
- For wet cell batteries, check voltage levels in each cell by probing the intercell connectors.
- Compare results to the optimal voltage levels for state of charge. Healthy rested voltage should be 12.6V or above.
- Test again with a load on the battery, such as turning the ignition key. Voltage shouldn’t dip below 10.5V when cranking.
- Keep tops of batteries clean and clear for accurate results. Charge fully if voltage is below 12.4V.
- Take periodic voltage measurements to track battery health over time. Decreasing rested voltage can indicate a failing battery.
- Record voltages to compare against benchmarks for your particular battery type and rating.
Using a marine voltmeter in this manner provides vital data on your battery’s charge level and early warning of any issues with charging, connections or dying cells. Monitoring voltage allows you to maximize battery life.
Target Voltage Range for a Fully Charged Marine Battery
When a marine battery is considered fully charged and ready for use, voltage measured at rest across the terminals should settle into the range of 12.6V to 12.8V. This voltage range indicates:
- All six 2V internal cells are charged up to maximum capacity.
- There is ample electrical energy available to start the motor and power accessories.
- The battery plates are saturated with electrolyte and ready for chemical reactions that produce electricity.
- The specific gravity of the battery acid is ideal at 1.265.
- There is very low internal resistance allowing current to flow freely.
Voltages below 12.6V mean the battery is not fully charged, while readings above 12.8V usually indicate an overcharged battery that may be damaged. Charging should be stopped when voltages reach around 12.7V to prevent overcharging.
It takes about 5-10 hours for most marine batteries to reach full charge from a depleted state below 12V. Voltage climbs steadily until tapering off at around 12.7V when full. Trickle charging at lower amperages can safely maintain peak voltage without risk of overcharging.
For reliable performance, a fully charged resting voltage of 12.6V – 12.8V should be attained before each use. Check voltage again periodically during operation. Discharging below 12.2V for prolonged periods will diminish battery capacity over time.
Signs Your Marine Battery is Undercharged or Overcharged
Voltage readings outside the optimal range can indicate an undercharged or overcharged marine battery:
Undercharged – voltage below 12.4V
- Slow cranking, hesitant starting of engine
- Dim electronics/instrument panels
- Battery not holding charge very long
- Loss of battery capacity over time
- Corrosion on terminals due to sulfation
Overcharged – voltage above 12.8V
- Excessive gassing/bubbling in cells
- High internal temperature & heat damage
- Rapid loss of electrolyte/drying out
- Faster deterioration of positive plates
- Reduced battery life
An undercharged battery struggles to provide sufficient power and is at risk of sulfation buildup. Overcharging causes electrolyte loss and permanent plate damage.
To keep your marine battery in the optimal voltage range:
- Recharge fully until voltage is 12.6V -12.7V
- Avoid discharging below 50% capacity/12V
- Use correct charger settings for battery type
- Check voltage frequently & top off charge as needed
- Consider a voltage-regulated solar charger
Monitoring voltage helps prevent under or overcharging and the related battery degradation over time. Most chargers stop automatically around 12.7V to prevent overcharge damage.

How to check if boat battery is charging
There are a few simple ways to check if your boat’s battery is actually charging (learn: How to Charge RV Battery Efficiently [5 Ways]) when connected to shore power or the engine alternator:
- Use a voltmeter to measure voltage across the battery terminals. If charging, voltage should climb steadily and plateau around 12.6V when fully charged. If voltage remains low, charging is not occurring.
- Check if the battery is cool to the touch. A battery being actively charged will feel slightly warm as chemical reactions take place. A cool battery indicates lack of charging.
- Observe the charge indicator gauge if your boat has one. It should move from the red “discharged” zone towards the green “charged” zone when charging is taking place.
- Look for bubbles in the battery cells. Gassing and bubbling indicates charging and electrolysis is occurring. Lack of bubbles means charging is not taking place.
- Turn on full interior lighting. If lights are bright, battery is likely being charged. Dim or flickering lights suggest an issue with charging.
- Listen for the charge relay activating when shore power is connected. No audible relay click could mean cables are disconnected.
Check all connections to make sure battery terminals are tight and cables are securely fastened if it appears your marine battery is not accepting a charge. Most charging issues can be resolved by cleaning and reconnecting cables and terminals.
Troubleshooting the Charging System if Voltage is Too Low
If your marine battery is consistently undercharged as indicated by low resting voltage below 12.4V, there could be an issue with the charging system. Here is how to troubleshoot:
- First ensure cables and terminals are clean and making good contact. Loose connections can prevent charging current from flowing properly.
- Check battery cell voltage with a multimeter looking for a bad cell shorting out the whole battery. One bad cell can drag all cells down.
- Test the alternator by starting the engine and measuring voltage on the battery terminals. Should see 13.6 – 14.4V range if alternator is working properly.
- Inspect alternator belt for signs of wear or cracking. Replace if needed to prevent belt slippage.
- Load test the battery. A bad battery will show voltage dropping rapidly under load. Replace if battery is determined to be faulty.
- Use a multimeter to check for voltage drop between alternator output and battery terminals. Excessive drop indicates a bad cable or connection.
- Make sure the battery charger is functioning, producing expected amperage, and is set for proper battery type if recharging from shore power.
- Consider installing a digital multimeter gauge for your battery bank to monitor voltage over time. This allows easy diagnostics of charging issues.
- Check all fuses in the charging systems. Blown fuses can prevent alternator output or shore power from reaching the battery.
Thorough inspection and testing of all charging system components is key to diagnosing and resolving chronic low voltage problems. Look for corrosion, wear, damage, resistance, and ensure compatible settings across the system.
Tips to Maintain Proper Voltage Levels for Marine Batteries
Here are some tips to help keep your marine batteries at optimal voltage levels for performance and longevity:
- Always recharge fully after each use until voltage is 12.6 – 12.7V
- Avoid deeply discharging batteries below 12.2V where possible
- Use the correct charging settings for your battery type – wet cell, AGM, gel, etc
- Check voltage frequently and top off charges whenever low
- Keep battery terminals clean and tight
- Run the engine for at least 30 minutes or take a long cruise weekly to top off charge
- Consider a maintenance charger or voltage-regulated solar charger to prevent discharge
- Replace batteries once they can no longer reach full (learn: Best 5 Battery Backup for Home [Full Guide]) charge voltage due to age/damage
- Charge in a ventilated area away from sparks & flames
- Disconnect shore power when not in use to prevent overcharging
- Check each battery cell’s voltage and specific gravity
- Make sure alternator belt is in good condition
- Load test batteries annually to diagnose any weak batteries
- Shutdown the electrical appliances and electrical components when your shut down the boat
Proper marine battery maintenance includes monitoring voltage regularly and taking corrective charging action as soon as discharge is detected. This maximizes performance and extends battery lifespan.
Voltage Fluctuations – What’s Normal vs Cause for Concern
Some voltage fluctuation in marine batteries is normal during operation. Delayed or stuck readings on digital voltmeters are also common and not necessarily concerning. Here are key benchmarks:
Normal:
- Discharge down to 12.2V under load
- Rebound to 12.6V+ after charging
- 0.1 – 0.2V drop when starting engine
- 0.1 – 0.3V rise when shutting off load
- +/- 0.1V fluctuation when idle
Cause for Concern:
- Big voltage drops when starting engine or engaging equipment, below 10.5V
- Failure to recharge fully back to 12.6V+
- Prolonged discharge below 11.8V
- Constant overvoltage above 12.8V
- Excessive voltage fluctuation at idle, more than 0.3V
- Rapid voltage changes indicate faulty cell(s)
Batteries are workhorses by design and expected to cycle between periods of charging and discharging. Small dips upon connection of loads and recovery when rested are perfectly normal. But big voltage drops or inability to recharge indicate a weak or damaged battery in need of replacement.
Factors That Can Cause Marine Battery Voltage to Drop
There are a few key factors that can result in an abnormal voltage drop in your marine batteries:
- Loose or corroded battery connections – resistive connections prevent full current flow
- A bad or weak cell within the battery – brings down voltage of entire system
- An old battery nearing end of lifespan – diminished plate capacity
- Low electrolyte levels – exposed plates increase resistance
- Dirty or sulfated battery plates – prevents electricity generation
- Short circuit in the electrical system – drains power
- Damaged or under-performing alternator – fails to fully recharge
- Clogged battery vent tubes – prevents gassing & recombination
- Cold temperatures – slow chemical reactions & reduce capacity
- Overpowering appliances/electronics – excessive load drains voltage
- Excessive cranking attempts – rapid discharge with no recharge
Monitoring your marine batteries for sudden voltage drops along with visual inspection and electrical system testing can help determine the root cause. Taking corrective action as soon as discharge is noticed maximizes battery lifespan and performance.
When to Recharge Based on Voltage Readings
Voltmeters allow easy monitoring of marine battery voltage to determine when recharging is needed. Generally, you should recharge your batteries if voltage falls below these thresholds:
- At Rest – Recharge below 12.4V
- Under Load – Recharge below 11.8V
- Fully Discharged – Below 11.6V urgent recharge needed
- After Heavy Usage – If voltage remains below 12.2V after 30 minutes of rest
- Prior to Expected Heavy Usage – Precharge if below 12.6V to avoid deep discharge
- Cold Temperatures – Charge anytime voltage falls below 12.2V
- Storage – Fully charge batteries and recharge every 2-3 months
- Before Leaving the Dock – Never leave with voltage below 12.2V
Regularly checking voltage gives you advance warning to start recharging before discharge becomes critically low. It also provides data to learn your electrical usage patterns and when your batteries start to struggle.
Get in the habit of recharging as soon as voltage dips below ideal levels, and always prior to major appliance use. Waiting until completely dead greatly diminishes battery capacity over time.
How Temperature Impacts Optimal Voltage Levels
Battery voltage readings can vary considerably based on ambient temperature in the marine environment. Colder temperatures reduce capacity and chemical activity in the battery, while warm conditions have the opposite effect.
As a rule of thumb, you should adjust your target voltage benchmarks by these amounts based on temperature:
- Freezing Temps – Increase voltage targets by 0.2V
- 40-60F – Add 0.1V to voltage targets
- 60-80F – Use standard voltage targets
- 80-100F – Reduce targets by 0.1V
- Above 100F – Subtract 0.2V from target voltages
For example, in very hot weather you may want to charge a bit early at 12.5V rather than waiting until the typical 12.4V discharge threshold. Battery testers have temperature sensors to automatically compensate readings.
Understanding temperature impact allows you to interpret voltage readings appropriately and make sure your batteries are charged well for the conditions. Overheating can accelerate battery failure, so take precautions in very hot climates.
Differences in Ideal Voltages for Various Battery Types
There are some key differences in ideal voltage levels based on marine battery type:
Wet Cell Lead-Acid: 12.6V – 12.8V fully charged
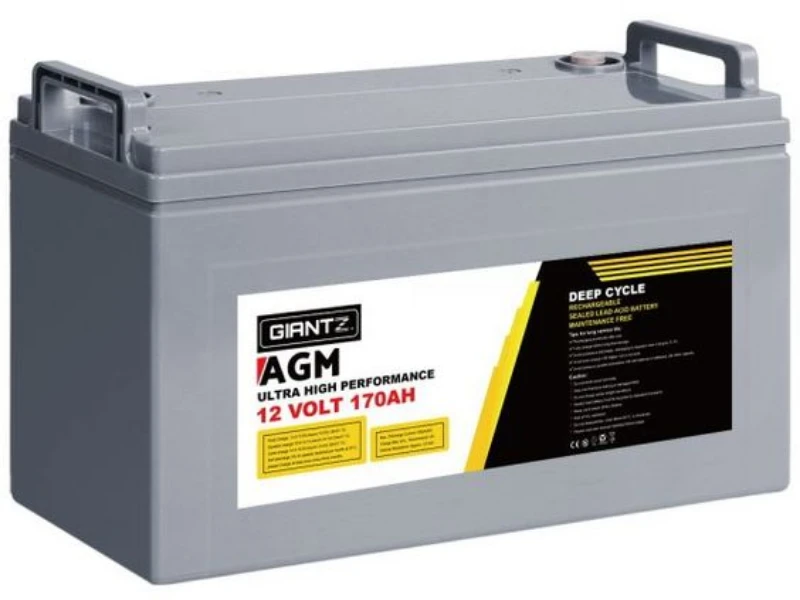
AGM: 12.8V – 13.0V is 100% charge
Gel Cell: 13.5V – 13.8V for full charge
Lithium-Ion: 13.2V – 13.5V is optimal
Cranking/Starting: 12.4V minimum for reliable starting
Deep Cycle: At least 12.6V to avoid sulfation
So check manufacturer specs for your particular battery brand and chemistry to zero in on the optimal voltage range. Auto-detecting smart chargers will automatically adjust their voltage regulation based on battery type.
But for quick reference using a voltmeter, aim for these fully charged voltages based on battery type:
Wet Cell – 12.7V AGM – 12.8-13.0V
Gel – 13.2-13.8V Lithium – 13.2-13.5V Cranking – 12.2-12.6V Deep Cycle – 12.6-12.8V
This allows you to properly evaluate charging needs and identify under or overcharging issues specific to your marine batteries.
Safety Tips When Checking Marine Battery Voltage
Checking marine battery voltage should be done safely to avoid shock or sparks. Here are some tips when using a voltmeter on your boat batteries:
- Wear eye protection in case of battery acid spray if a cell vent pops.
- Make sure the voltmeter leads have insulated grips and the device is designed for automotive use.
- Turn off all battery switches and electrical systems before disconnecting cables.
- Remove metal jewelry which could touch the battery posts.
- Keep your face away from the battery vents.
- Avoid leaning directly over the battery when making connections.
- Attach the ground lead first, then connect the positive lead. Disconnect positive first when finishing.
- Never allow battery cables or leads to touch each other while attached.
- Clean corrosion from terminals to ensure good connections.
- Don’t use a voltmeter if the battery is gassing heavily.
- Charge wet cell batteries in a well-ventilated area to prevent gas buildup.
- Check the condition of the alternator belt regularly.
Following basic precautions will help keep your electrical system safe while testing voltage. Make sure to use a marine-rated digital voltmeter.
Warning Signs of a Failing Marine Battery Based on Voltage
A marine battery that can no longer hold a proper charge is one of the clearest signs that it is failing and needs replacement. Watch for these specific voltage symptoms of a dying battery:
- Resting voltage consistently below 12.4 volts after recharging
- Inability to reach full charging voltage of 12.6V despite repeated charge cycles
- Voltage quickly tapers down to low levels again soon after the charger is disconnected
- Severe voltage drops under load, falling below 10.5V when starting the engine
- The battery needs recharging much more frequently than when brand new
- Wide variance in voltage measured between individual battery cells
- Corroded, melted or swollen battery terminals
- Strong sulfur smell coming from battery vents
- Visible cracks in the battery case
As lead-acid batteries age, their internal resistance increases causing resting voltage to decline, capacity to diminish, and charging efficiency to decrease. Any marine battery that fails to reach full charge voltage due to age or damage should be promptly replaced to avoid being stranded with dead batteries. Monitoring voltage identifies problems early.
Selecting From Different Types of Marine Batteries – Deep Cycle vs. Starting vs. Dual Purpose
When selecting a new marine applications battery, (learn: Marine Battery vs Car Battery: A Comprehensive Comparison Guide) the main choices are: deep cycle, starting/cranking, or dual purpose batteries. Consider these factors:
Deep-cycle batteries have thicker lead plates to withstand frequent deep discharging and recharging. The plates are solid lead alloy rather than thin sheets. This makes them resilient for powering accessories and appliances over long periods, such as a trolling motor. Deep cycle marine batteries (learn: What is A Deep Cycle Battery [Full Guide]) are available in wet, AGM, and gel types. They have lower CCA ratings but higher amp-hour capacities around 80-150 Ah. Popular for smaller boats.
Starting/cranking batteries have thinner plates with more surface area designed to deliver intense power bursts to start engines. But they cannot withstand sustained deep discharging. Ideal for engine starting in boats with alternators to recharge. They offer high CCA ratings around 500-1500 to turn over marine engines up to 300 HP.
Dual purpose batteries are a compromise, with moderate plate thickness and amp-hour ratings around 45-100 Ah. They can handle some deep cycling and still provide sufficient cranking amps for engine starting. Good general batteries for boats with a single battery setup powering both engine and accessories.
Larger boats may benefit from having separate deep cycle and starting batteries to serve different functions. Or consider 24V or 36V systems for liveaboard boats with high electrical loads. Monitoring voltage ensures any marine battery system stays charged and in top condition.
Extending the Lifespan of Your Marine Batteries
To maximize the lifespan of the marine batteries powering your boat, here are our good idea:
- Recharge at the first sign of voltage drop, don’t allow deep discharges.
- Use a smart voltage-regulated charger matched to your battery chemistry.
- Equalize wet cell batteries occasionally if permitted by manufacturer.
- Keep batteries fully charged in storage with occasional maintenance charging.
- Maintain clean and tight electrical connections to minimize resistance.
- Limit vibration by securing batteries firmly in place.
- Provide adequate ventilation for charging batteries to release gasses.
- Avoid exposing batteries to extreme hot or cold temperatures.
- Periodically check each cell’s voltage and specific gravity.
- Consider desulfation methods if batteries are sulfating prematurely.
Getting the most life out of your marine batteries requires staying vigilant about recharging needs, providing proper charging equipment, maintaining good electrical connections and monitoring battery health over time.